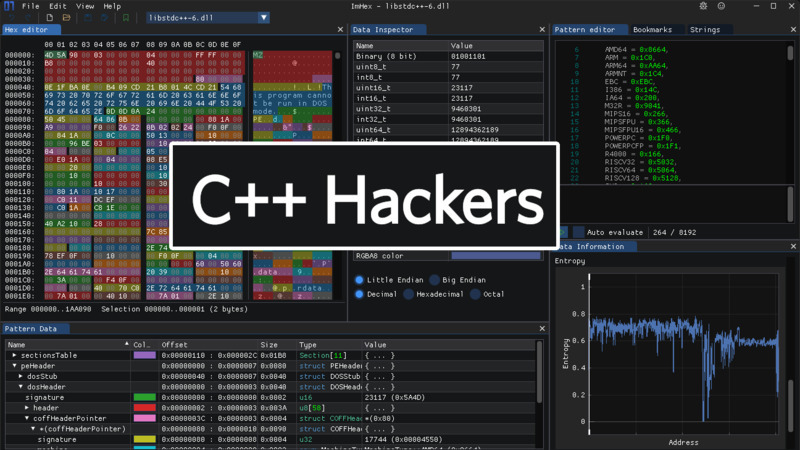
ImHex is a hexadecimal editor, written in C++, for reverse engineers, programmers and people who they value their retinas when they work at 3 am. 😃
There are a multitude of things that can be done with ImHex. In this video we will see how it can be useful, for example, to “hide” the assets (images, fonts, audios, …) of your games by transforming them into Hex!
As an example, we will show how to implement it in Game Development more precisely in SFML.
💾 How to install ImHex
You can use compressed binary packages available in Releases in the ImHex GitHub repository.
There are packages for: Windows with MSYS2, macOS, Debian(suitable for Ubuntu, Mint and among others), Arch and Fedora.
Once downloaded, you can use the package. Example on Ubuntu:
wget -q https://github.com/WerWolv/ImHex/releases/download/v1.31.0/imhex-1.31.0-Ubuntu-23.04-x86_64.deb
sudo apt install ./imhex-1.31.0-Ubuntu-23.04-x86_64.deb
Or you can also compile ImHex from scratch, which is how I did it…
🚀 How to Compile and Install
First of all, make sure you have the dependencies:
On Ubuntu, Debian, Mint:
apt install -y build-essential gcc-12 g++-12 lld ${PKGCONF:-} cmake ccache \
     libglfw3-dev libglm-dev libmagic-dev libmbedtls-dev libfreetype-dev \
     libdbus-1-dev libcurl4-gnutls-dev libgtk-3-dev ninja-build
In Arch:
pacman -S $@ --needed cmake gcc lld glfw file mbedtls freetype2 dbus gtk3 curl fmt \
     yara nlohmann-json ninja
In Fedora:
dnf install -y cmake dbus-devel file-devel freetype-devel libcurl-devel gcc-c++ git \
     mesa-libGL-devel glfw-devel lld mbedtls-devel gtk3-devel
In Gentoo:
emerge -n yara mbedtls ccache nlohmann-json glfw fmt gtkIn MSYS2
pacman -S --needed --noconfirm \
   mingw-w64-x86_64-gcc\
   mingw-w64-x86_64-lld\
   mingw-w64-x86_64-cmake\
   mingw-w64-x86_64-ccache\
   mingw-w64-x86_64-glfw\
   mingw-w64-x86_64-file\
   mingw-w64-x86_64-curl-winssl \
   mingw-w64-x86_64-mbedtls\
   mingw-w64-x86_64-freetype\
   mingw-w64-x86_64-dlfcn\
   mingw-w64-x86_64-ninja\
   mingw-w64-x86_64-capstone
Now recursively clone the repository, compile and install with the commands below:
git clone --recurse-submodules https://github.com/WerWolv/ImHex
cd ImHex
mkdir build && cd build

CC=gcc CXX=g++ cmake -DCMAKE_BUILD_TYPE=Release -DCMAKE_INSTALL_PREFIX="/usr" \
        -DCMAKE_C_COMPILER_LAUNCHER=ccache -DCMAKE_CXX_COMPILER_LAUNCHER=ccache \
        -DCMAKE_C_FLAGS="-fuse-ld=lld" -DCMAKE_CXX_FLAGS="-fuse-ld=lld" \
        -DCMAKE_OBJC_COMPILER_LAUNCHER=ccache -DCMAKE_OBJCXX_COMPILER_LAUNCHER=ccache ..

sudo make installAfter installation, you can now remove the cloned repository:
cd ../..
rm -rf ImHex/
Usage
In this example we will see how to hide your assets with ImHex and as a guinea pig we will use SFML. So to do this, follow the steps:
01. Choose an image, a font, or any other asset you want to reverse engineer with ImHex.
02. Click: File > Open File and select the file you want
03. Press: Ctrl + a to select all binary addresses
04. Then click: Edit > Copy as… > C++ Array
05. Create a file to store your array, example: img.hpp
06. Paste the copied array and rename the data array to img_data
07. Save and do the same steps for source, for example, or any other binary as said.
After that, include the files in your code and don’t forget to include the headers: #include <cstdint> (for type uint8_t) and also #include <array>.
Compile and see that even without static files, your project will render the assets without any problems.
Tip: the ideal is to store the array on the heap and preferably using smart pointers.
See and test with the example codes below:
💫 Click here to see img.hpp
💫 Click here to see font.hpp
💻 C++ SFML code with data
#include <SFML/Graphics.hpp>
#include <cstdint>
#include <array>
#include "img.hpp"
#include "font.hpp"

int main(){
  sf::RenderWindow window(sf::VideoMode(1280,720), "SFML::Terminal Root");

  sf::Image img;
  img.loadFromMemory(img_data.data(), img_data.size());

  sf::Texture texture;
  texture.loadFromImage(img);

  sf::Sprite sprite(texture);

  sf::Font font;
  font.loadFromMemory(data.data(), data.size());

  sf::Text text("Terminal Root", font, 100);
  text.setFillColor(sf::Color::White);
  text.setOutlineColor(sf::Color::Black);
  text.setOutlineThickness(4);
  text.setPosition(100.f, 10.f);


  while( window.isOpen() ){
    sf::Event event;
    while( window.pollEvent(event)){
      if( event.type == sf::Event::Closed ){
        window.close();
      }
    }

    window.clear(sf::Color(55, 44, 77));
    window.draw(text);
    window.draw(sprite);
    window.display();
  }

  return EXIT_SUCCESS;
}
Compile:
g++ main.cpp -lsfml-graphics -lsfml-window -lsfml-system
🎥 Watch the video
The video is in Portuguese, however, all the steps described here can be followed regardless of your language. But, if you want to understand what was said, use YouTube’s automatic translation.


