Introduction
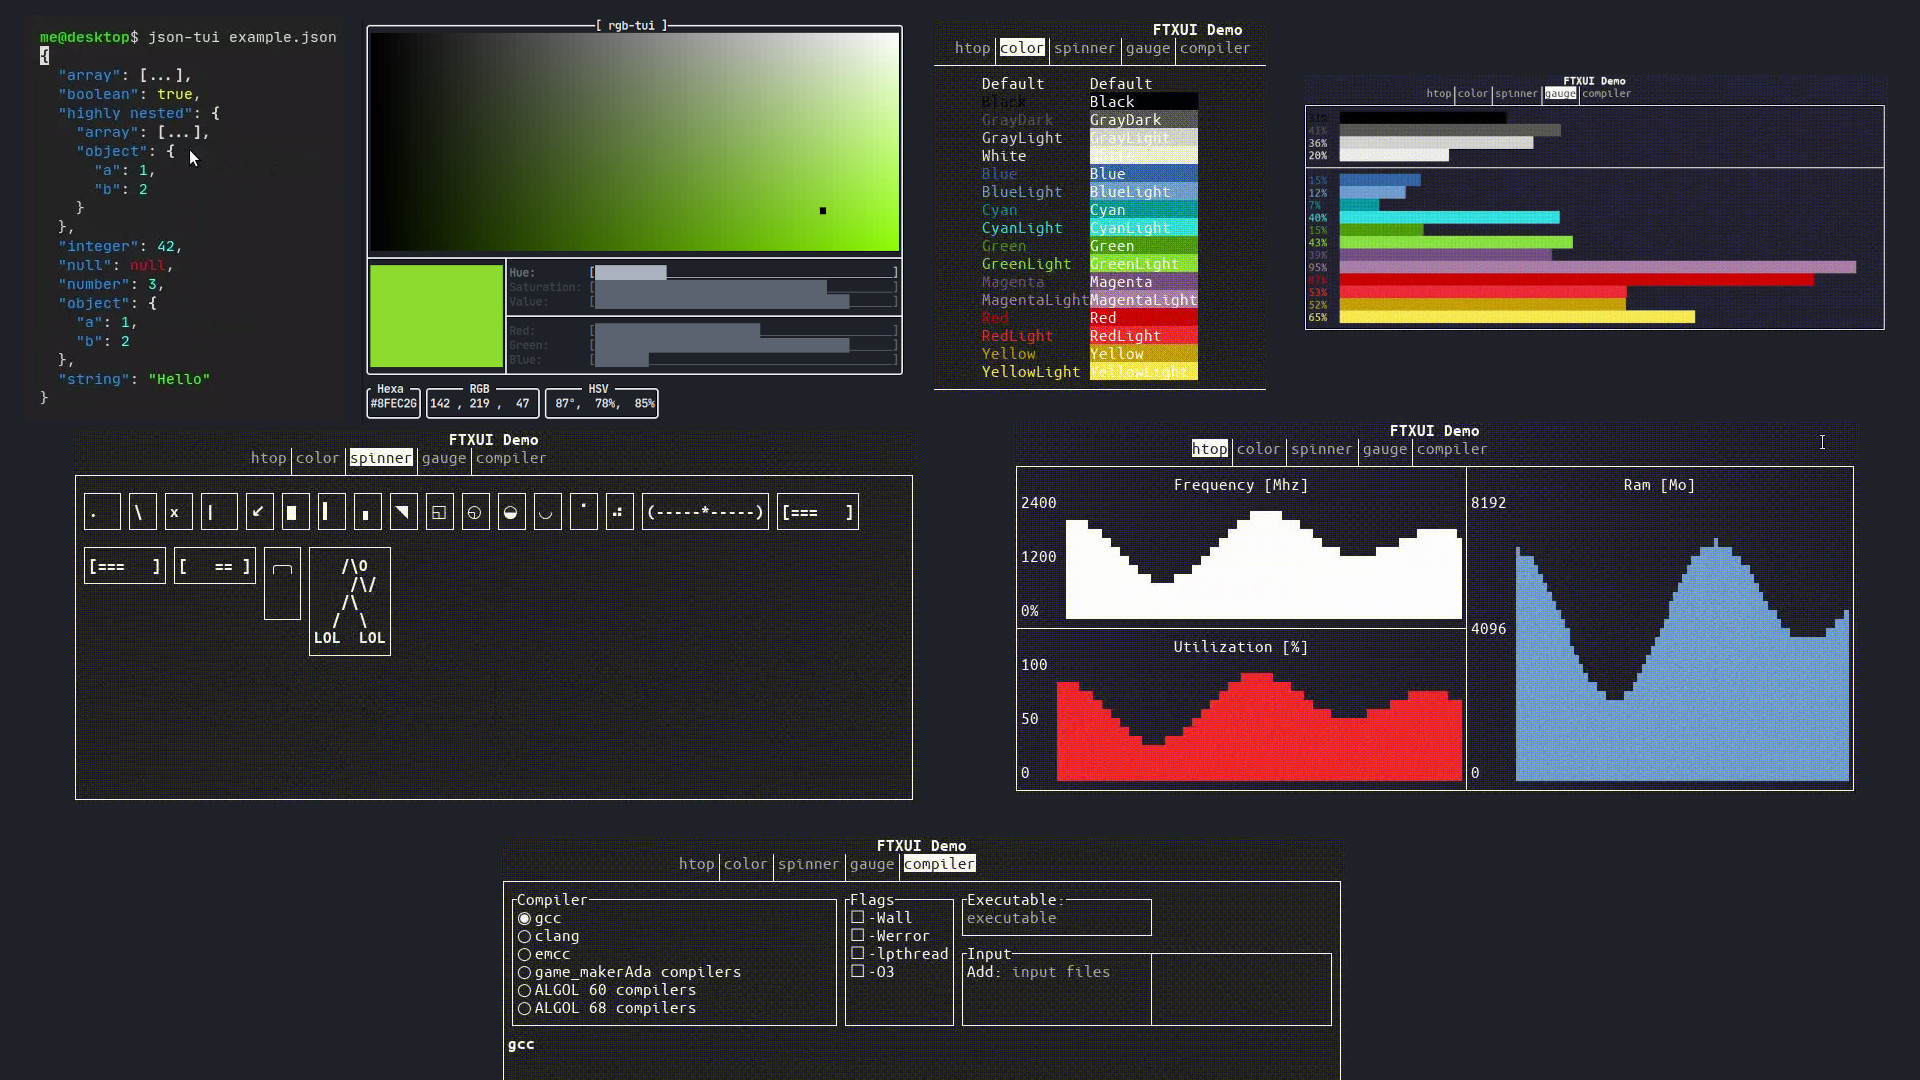
FTXUI is a library for creating “graphical” applications for the terminal. It is available for GNU/Linux, Windows and macOS, as well as being able to create apps for WEB with WebAssembly.
We have some blog articles with publishing apps that were made with FTXUI:
How to install FTXUI
First of all make sure you have the dependencies, which are: g++, make, cmake, ncurses and git .
For example installation in your distro we will use Ubuntu as a reference, example of installation of dependencies in Ubuntu:
sudo apt install g++ make cmake libncurses5-dev gitUse ‘search’ in your distro’s package manager or operating system to find the corresponding package names.
Installation
The installation will only serve to facilitate the use of Intelissense from your IDE or easier local copies, we will see more details below. To install, first…
git clone https://github.com/ArthurSonzogni/ftxui
ftxui cd
cmake -B build .
cd build && make
sudo make install
cd ../.. && rm -rf ftxui
Understanding FTXUI
FTXUI has 3 Modules which are:
dom- This is the main module, mandatory even if it is aHello, World!of life;screen- Display the elements defined in the dom to display on the screen, also mandatory for any project;component- This module is optional and it has components such as: user input, widgets, and so on.
Creating a basic project
Let’s create a simple project that will only print “Hello, World!” on the screen and let’s call it 01-ftxui:
mkdir 01-ftxui
cd 01-ftxui
nvim main.cpp
Let’s add:
- Example 01:
Basic Hello, World! with rounded corners.
// main.cpp
#include <ftxui/dom/elements.hpp>
#include <ftxui/screen/screen.hpp>
#include <iostream>

int main(){
  const std::string hello {"Hello, World!"};
  ftxui::Element doc = ftxui::hbox(
    ftxui::text( hello ) | ftxui::border
  );
  ftxui::Screen screen = ftxui::Screen::Create(
    ftxui::Dimension::Fixed( hello.length() + 1 ),
    ftxui::Dimension::Fixed(3)
  );

  ftxui::Render(screen, doc);
  screen.Print();
  std::cout << '\n';
  return 0;
}
Example of CMakeLists.txt:
cmake_minimum_required (VERSION 3.11)
project(a.out
  LANGUAGES CXX
  VERSION 1.0.0
)

include(FetchContent)

set(FETCHCONTENT_UPDATES_DISCONNECTED TRUE)
FetchContent_Declare(ftxui
  GIT_REPOSITORY https://github.com/ArthurSonzogni/ftxui
)

FetchContent_GetProperties(ftxui)

if(NOT ftxui_POPULATED)
  FetchContent_Populate(ftxui)
  add_subdirectory(${ftxui_SOURCE_DIR} ${ftxui_BINARY_DIR} EXCLUDE_FROM_ALL)
endif()

add_executable(${PROJECT_NAME} main.cpp)
target_include_directories(${PROJECT_NAME} PRIVATE src)

target_link_libraries(${PROJECT_NAME}
  PRIVATE ftxui::screen
  PRIVATE ftxui::dom
)- Compiling and running
cmake -B build .
cd build && make
./a.out
Optimizing repository clone when compiling
Note that the line: GIT_REPOSITORY https://github.com/ArthurSonzogni/ftxui it downloads from the repository on GitHub, but suppose you are offline, you can use the repository itself on your machine. Example:
- First clone the repository to a system directory:
The installed directory won’t work because it doesn’t have a
.gitinside it!
sudo git clone https://github.com/ArthurSonzogni/ftxui /opt/ftxuiIf you want to save to your normal user, choose a location in
/home/$USERand don’t usesudo.
Now change the corresponding line of your CMakeLists.txt and indicate the location of the repository you cloned:
GIT_REPOSITORY /opt/ftxuiTo test from scratch, remove build/ and redo the process:
rm -rf build
cmake -B build .
cd build && make
./a.out
Another example with more than one box
mkdir example02
cd example02
cp ../example01/main.cpp main.cpp
vim main.cpp
#include <ftxui/dom/elements.hpp>
#include <ftxui/screen/screen.hpp>
#include <iostream>
int main(){
const std::string hello {"Hello"},
world {"World"},
myftxui {"FTXUI"};
ftxui::Element doc = ftxui::hbox(
ftxui::text( hello ) | ftxui::border,
ftxui::text( world ) | ftxui::border,
ftxui::text( myftxui ) | ftxui::border
);
ftxui::Screen screen = ftxui::Screen::Create(
ftxui::Dimension::Full(),
ftxui::Dimension::Fit(doc)
);
ftxui::Render(screen, doc);
screen.Print();
std::cout << '\n';
return 0;
}If you want the box to take up the remaining space, send the output to ftxui::flex, examples:
ftxui::text( world ) | ftxui::border | ftxui::flex
// Or
ftxui::text( world ) | ftxui::border | ftxui::flex,
// Or
ftxui::text( myftxui ) | ftxui::border | ftxui::flex
Or all together!
Conclusion
You can still add colors, for example:
ftxui::text( hello ) | ftxui::border | ftxui::flex | ftxui::color(ftxui::Color::Green),
ftxui::text( world ) | ftxui::border | ftxui::flex | color(ftxui::Color::Red ),
ftxui::text( myftxui ) | ftxui::border | ftxui::flex | color(ftxui::Color::Blue)
Note that for
color()you can choose not to use thenamespace, or if you want to specify you can also use it, in addition to also usingbgcolorfor inner padding.
And among several other resources such as: Button, Input, Checkbox and among many others that can be found in documentation, in addition to other examples .
Useful links
- Repository: https://github.com/ArthurSonzogni/ftxui
- Website: https://arthursonzogni.github.io/FTXUI/
- Documentation: https://arthursonzogni.github.io/FTXUI/index.html#introduction
- Examples: https://arthursonzogni.github.io/FTXUI/examples_2component_2button_8cpp-example.html
Watch the video
The video below is in Portuguese, but you can see how all the concepts mentioned in this article work.


