Allegro is a cross-platform library primarily aimed at game development, but is also widely used in multimedia programming.
In this article we will see how to install the Allegro library on Windows and compile our code with Allegro in two ways: with Visual Studio and with GCC/G++ with MinGW, in case you want to use it with a different code editor or IDE.
In addition to also knowing how to install on GNU/Linux in any distribution.
01. Installation on Windows
Let’s see through this step by step how to install on Windows and compile with Visual Studio first.
- 1. Open Visual Studio and click on Create a New Project
- 2. Choose C++ and Empty Project and click Next
- 3. Enter the name of your project and choose the location where you will save it and click Create
- 4. Right-click your project and select the option: Manage NuGet Packages…
- 5. Select the tab: Search and type the word Allegro
- 6. Select the first package that has the name:** Allegro** and in the right corner click on Install . In the window that will open, just click OK and wait for the installation when there is the word Finished at the bottom
- 7. Close the two NuGet windows on the right side, right-click again on your project name, go to Add and New Item
- 8. Choose your file name. Remembering that in addition to being able to create files with a
.cppextension and other related ones, you can also create a.cfile, in this case I will create a file with the.cextension (for C language) and name:main.cand click Add - 9. Now click again with the right mouse button on top of your project name, go to Properties
- 10. Note that in the tree on the right side there is the option: Allegro 5, click on it to expand and then select Library Type, then click on it again, but on the option on the right side and select the item : Dynamic Debug - Dynamic runtime
- 11. Now in the tree on the left side choose the Allegro 5 Add-ons sub-item and once selected, click on each of the options on the right side and mark as Yes and click on Apply and Ok after that
- 12. Copy this test file and paste it inside the file you created:
#include <allegro5/allegro.h>
#include <allegro5/allegro_font.h>

int main (){

  al_init();
  al_init_font_addon();

  ALLEGRO_DISPLAY * display = al_create_display(640,480);
  al_set_window_position(display, 200, 200);

  ALLEGRO_FONT* font = al_create_builtin_font();
  ALLEGRO_TIMER* timer = al_create_timer(1.0 / 60.0);

  ALLEGRO_EVENT_QUEUE * event_queue = al_create_event_queue();
  al_register_event_source(event_queue, al_get_display_event_source(display));
  al_register_event_source(event_queue, al_get_timer_event_source(timer));
  al_start_timer(timer);

  while(true){
    ALLEGRO_EVENT event;
    al_wait_for_event(event_queue, &event);
    if( event.type == ALLEGRO_EVENT_DISPLAY_CLOSE ){
      break;
    }

    al_clear_to_color(al_map_rgb(255,255,255));
    al_draw_text(font, al_map_rgb(0, 0, 0), 230, 200, 0, "Allegro is working!");
    al_flip_display();
  }

  al_destroy_font(font);
  al_destroy_display(display);
  al_destroy_event_queue(event_queue);

  return 0;
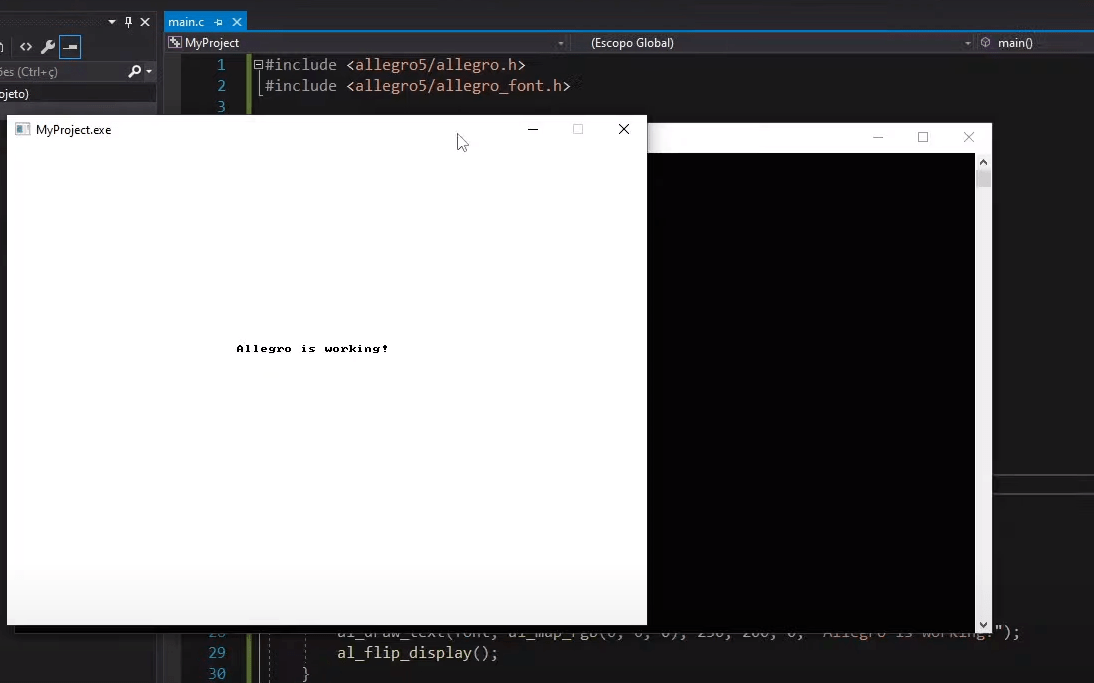
}- 13. Then compile the code and show the window below, that means everything is ok and you can use Visual Studio this way to start creating your Games with Allegro on Windows!
Compiling Allegro with GCC/G++ and MinGW on Windows
Make sure you already have GCC/G++ with MinGW properly installed and configured on your Windows, see how to do it correctly in this article.
-
1. Now download the file: allegro-x86_64-w64-mingw32-gcc-12.1.0-posix-seh-static-5.2.8.0.zip from https://github.com/liballeg/allegro5/releases
-
2. Extract the file and move to
C:\drive -
3. Open
CMDor PowerShell (which should already be properly configured with MinGW for GCC/G++) and enter your project where there is the file(s) with the Allegro code, example:MyProject/main.c
cd MyProject- 4. Also copy the files from the
C:\allegro folderinto your project:
The
liballegro_monolith.dll.alibrary:
xcopy C:\allegro\lib\liballegro_monolith.dll.aAnd
allegro_monolith-5.2.dlllibrary:
xcopy C:\allegro\bin\allegro_monolith-5.2.dll- 5. Run this command:
gcc -I C:\allegro\include -c main.cIf you have a problem, increment the command with
-L,example:gcc -I C:\allegro\include -L C:\allegro\lib -c main.c, note that after-Lthe path is from\lib
- 6. After that run the command::
gcc -I C:\allegro\include main.o -o program.exe liballegro_monolith.dll.aIf you have a problem, increment the command with
-L, for example:gcc -I C:\allegro\include -L C:\allegro\lib main.o -o program.exe liballegro_monolith.dll.a.
- 7. And now run the binary
program.exe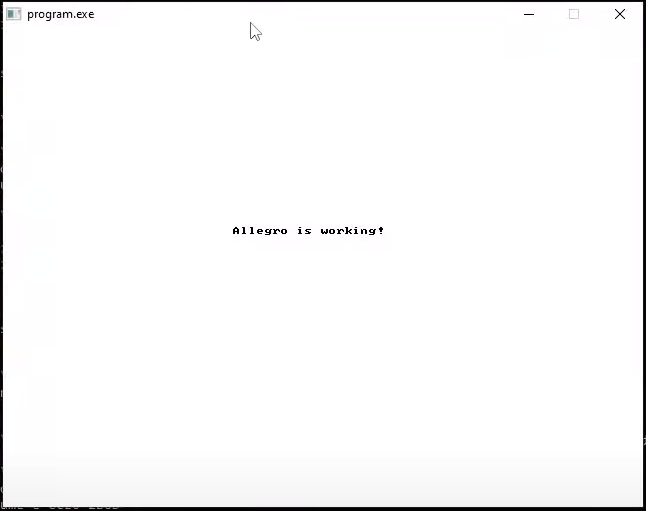
Utilizando make com Makefile
If you want to automate the compilation, use a Makefile. Create a file named Makefile (Do not use Notepad, it adds a .txt to the end of the file name, and this file cannot have an extension)
Copy the code below and paste it inside your Makefile, and save the file inside your project
TARGET=program.exe
CC=gcc
ALLEGRO=C:\allegro\include
STATIC=liballegro_monolith.dll.a
LD=gcc
OBJS=main.o
all: $(OBJS)
	$(LD) -I $(ALLEGRO) -o $(TARGET) $(OBJS)  $(STATIC)
	$(TARGET)
main.o: main.c
	$(CC) -I $(ALLEGRO) -c main.c -o main.o
Rename the mingw32-make.exe file in the C:\mingw64\bin\mingw32-make folder to just make.exe.
Now when you are inside your project via CMD or PowerShell, just run the make command, it will compile and run in an easier way
cd MyProject
make
02. Installation on GNU/Linux
Make sure you already have the build tools: compilers: gcc and g++, scons: make, pkg-config and/or others.
Ubuntu, Debian, Linux Mint and similar
sudo apt install liballegro5.2 liballegro5-devFedora
sudo dnf install allegro5 allegro5-develArch Linux, Manjaro and similar
sudo pacman -S allegroGentoo, Funtoo and similar
sudo emerge allegroTo compile and run with any header use the command below or the Makefile also below
gcc main.c $(pkg-config --list-all | grep -oE 'allegro_[a-z]+ ' | sed 's/^/-l/g' | tr '\n' ' ') -lallegro
./a.out
Makefile
TARGET=a.out
CC=gcc
DEBUG=-g
OPT=-O0
WARN=-Wall
ALLEGRO=-lallegro -lallegro_main -lallegro_audio -lallegro_dialog -lallegro_ttf -lallegro_image -lallegro_color -lallegro_memfile -lallegro_acodec -lallegro_primitives -lallegro_font
CCFLAGS=$(DEBUG) $(OPT) $(WARN) $(ALLEGRO)
LD=gcc
OBJS= main.o
all: $(OBJS)
	$(LD) -o $(TARGET) $(OBJS) $(CCFLAGS)
	@rm *.o
	@./$(TARGET)

main.o: main.c
	$(CC) -c $(CCFLAGS) main.c -o main.o
Basic Example
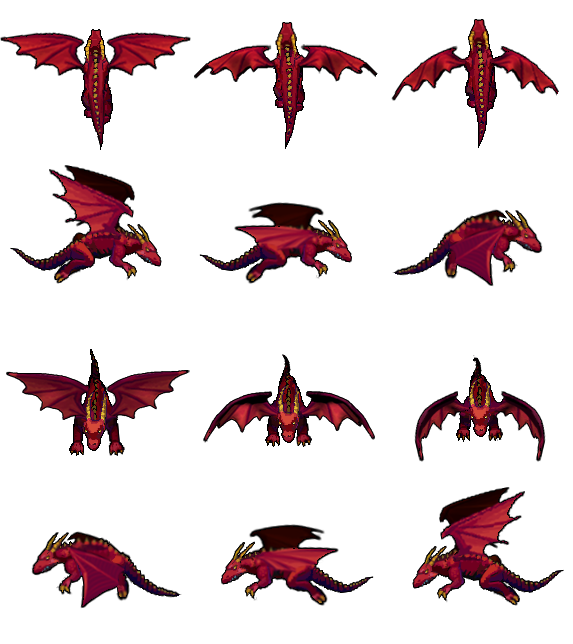
The example below is code written with Allegro. It’s just an animation of a Dragon and it moves when we press the arrow keys ⇐ ⇑ ⇒ ⇓.
Read the source code to understand the lines, the files used (images and font) are after the code.
Dragon image
Background image

Download font
Click here to download the font
Code main.c
#include <allegro5/allegro.h>
#include <allegro5/allegro_font.h>
#include <allegro5/allegro_ttf.h>
#include <allegro5/allegro_image.h>
#include <allegro5/keyboard.h>

int main (){

  al_init();
  al_init_font_addon();
  al_init_ttf_addon();
  al_install_keyboard();

  ALLEGRO_DISPLAY * display = al_create_display(1280,720);
  al_set_window_position(display, 200, 200);
  al_set_window_title(display, "Here be Dragons!");

  al_init_image_addon();
  ALLEGRO_BITMAP *sprite = al_load_bitmap("./dragon.png");
  ALLEGRO_BITMAP *bg = al_load_bitmap("./bg.png");

  double frame = 0.f;
  int pos_x = 0, pos_y = 0;
  int current_frame_y = 161, velocity = 20;

  ALLEGRO_FONT* font = al_load_font("./font.ttf", 40, 0);
  ALLEGRO_TIMER* timer = al_create_timer(1.0 / 30.0);

  ALLEGRO_EVENT_QUEUE * event_queue = al_create_event_queue();
  al_register_event_source(event_queue, al_get_display_event_source(display));
  al_register_event_source(event_queue, al_get_timer_event_source(timer));
  al_register_event_source(event_queue, al_get_keyboard_event_source());
  al_start_timer(timer);

  while(true){
    ALLEGRO_EVENT event;
    al_wait_for_event(event_queue, &event);
    if( event.type == ALLEGRO_EVENT_DISPLAY_CLOSE ){
      break;
    }else if( event.keyboard.keycode == ALLEGRO_KEY_RIGHT ){
      current_frame_y = 161;
      pos_x += velocity;
    }else if( event.keyboard.keycode == ALLEGRO_KEY_UP ){
      current_frame_y = 0;
      pos_y += velocity;
    }else if( event.keyboard.keycode == ALLEGRO_KEY_DOWN ){
      current_frame_y = 161 * 2;
      pos_y -= velocity;
    }else if( event.keyboard.keycode == ALLEGRO_KEY_LEFT ){
      current_frame_y = 161 * 3;
      pos_x -= velocity;
    }

    frame += 0.3f;
    if( frame > 3 ){
      frame -= 3;
    }

    al_clear_to_color(al_map_rgb(255,255,255));
    al_draw_bitmap(bg, 0, 0, 0);
    al_draw_text(font, al_map_rgb(0, 0, 0), 2, 2, 0, "score: dragon");
    al_draw_text(font, al_map_rgb(255, 255, 255), 0, 0, 0, "score: dragon");
    al_draw_bitmap_region(sprite, 191 * (int)frame, current_frame_y, 191, 161, pos_x, 720 - 161 - pos_y, 0);
    al_flip_display();
  }

  al_destroy_font(font);
  al_destroy_bitmap(bg);
  al_destroy_bitmap(sprite);
  al_destroy_display(display);
  al_destroy_event_queue(event_queue);

  return 0;
}
If you want the step by step of how the lines were included, watch the video below.
The video is in Portuguese, enable Youtube’s automatic translation and translate it into your language.
Usefull links
https://liballeg.org/
Examples and online games: https://liballeg.org/examples_demos.html
allegro gamedev clanguage cpp cppdaily gcc windows gnu linux


